You can easily bring your Kopano e-mails, appointments and contacts to your Apple iPhone/iPad or Android smartphone/tablet via ActiveSync. To make this possible, the ActiveSync-compatible Z-Push is integrated into the Kopano server. In this article I will explain step by step how to connect Kopano to your mobile device.
I will start with Android, for Apple devices the procedure is basically the same, but is also explicitly explained here step by step.
Setting up Kopano on an Android device
Since Android interfaces differ from version to version and from device to device, the individual steps may look slightly different for you, but the procedure should look and work the same for everyone.
1. Open settings
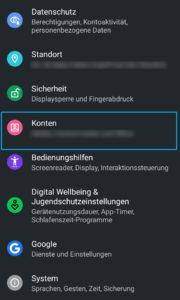
Click into the settings of your device, the easiest way to do this is to swipe down from the top of the screen and tap on the gear icon.
Find the menu item “Accounts” and tap on it:
2. Add account
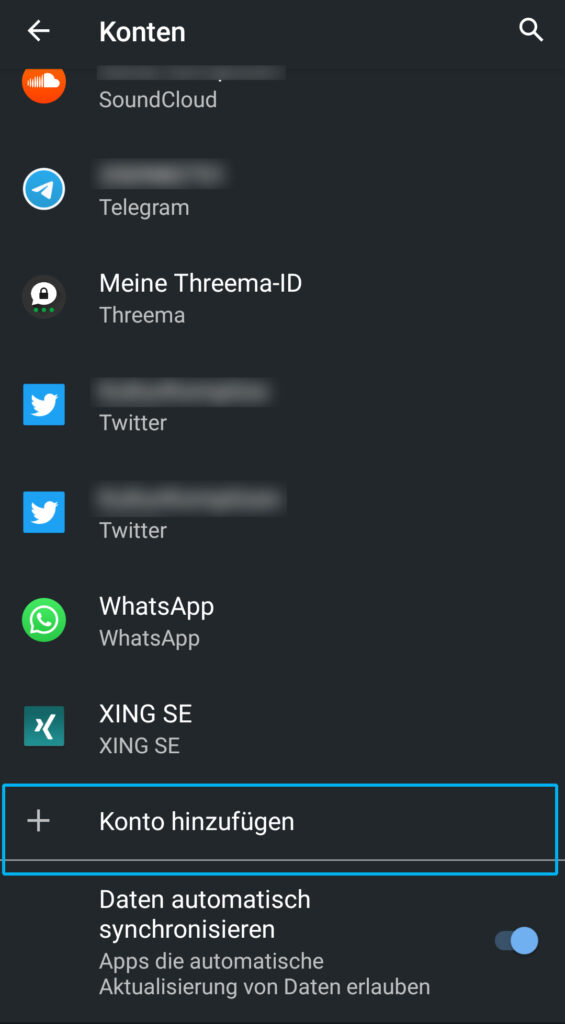
Scroll to the bottom and tap “Add account”.
3. Select Exchange
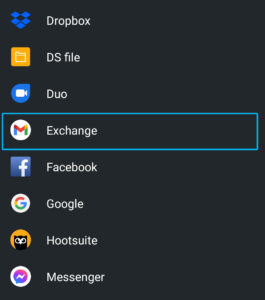
Select Exchange from the list – depending on how many accounts you have, the list can be very short or very long.
4. Enter the e-mail address
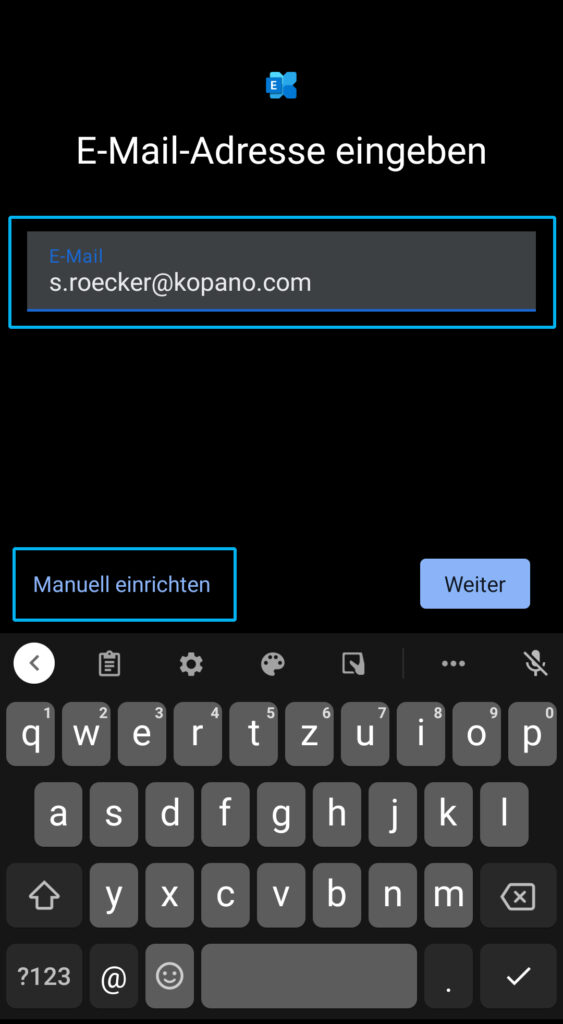
Enter the e-mail address you want to set up. In the screenshot you can see my email address at Kopano as an example – yours will of course look different. Then tap on Set up manually.
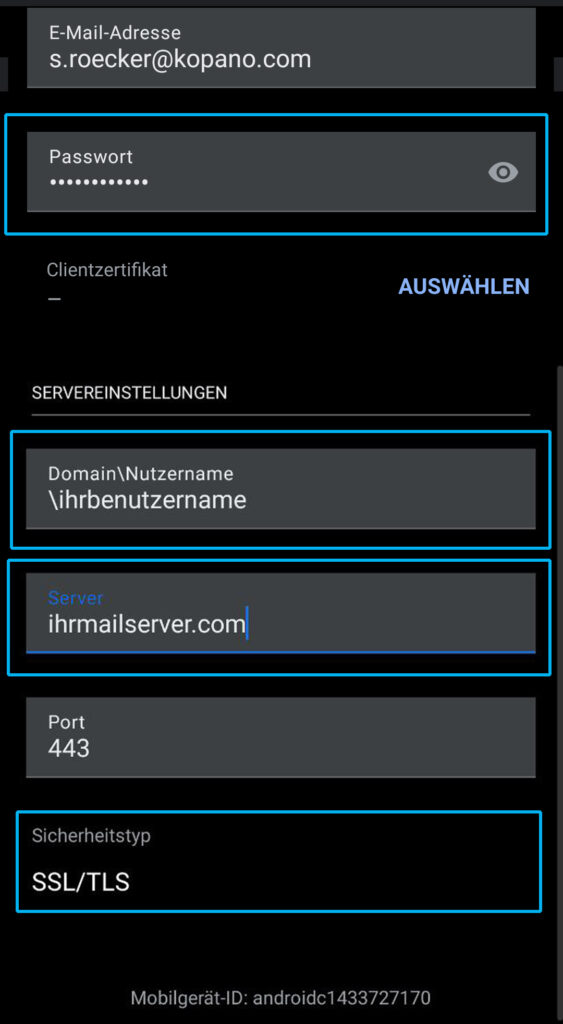
5. Enter password and server settings
In the screen that now appears, enter your password at the top and the server settings, your user name, the address of your mail server and the security type at the bottom. The entries shown are only examples! Your administrator or IT service provider will tell you which data you have to enter.
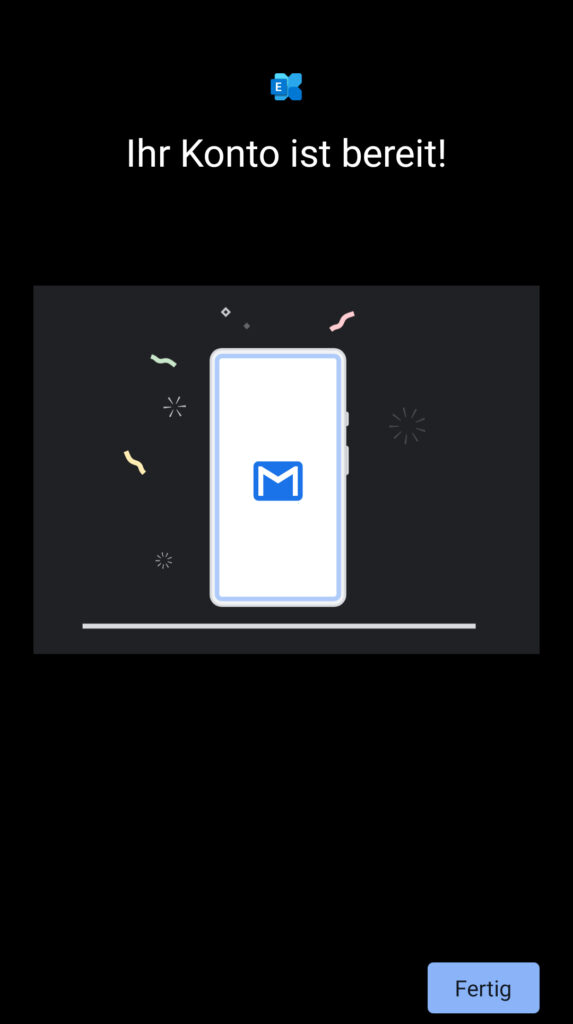
6. Account ready
So much for the settings – your account is now set up. Tap on “Done” and follow the last steps.
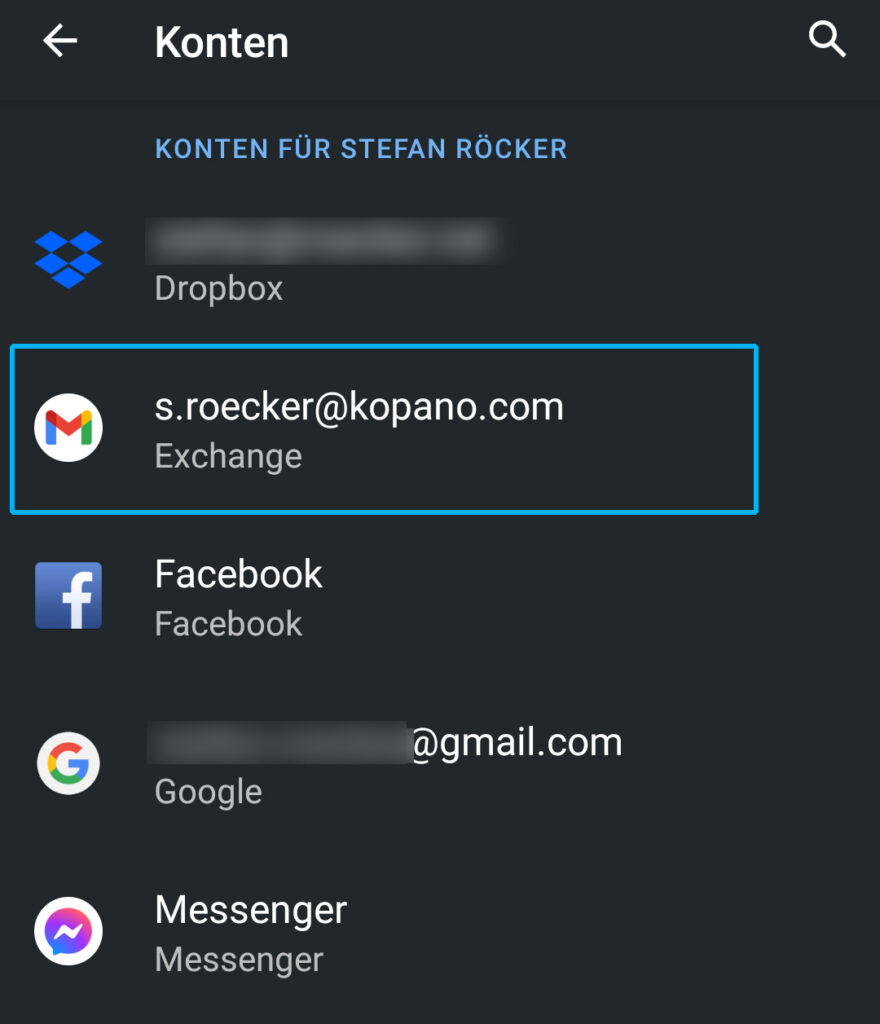
7. View new account
In the Accounts section you will now find your new “Exchange” account with your email address. Tap on it.
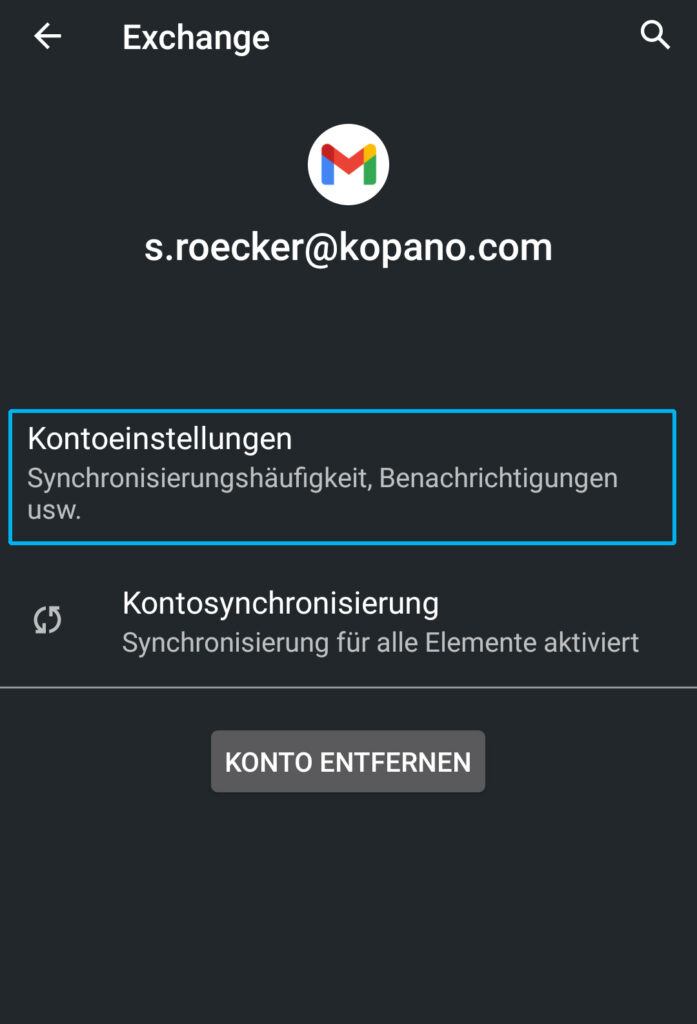
8. Account settings
Tap Account Settings here.
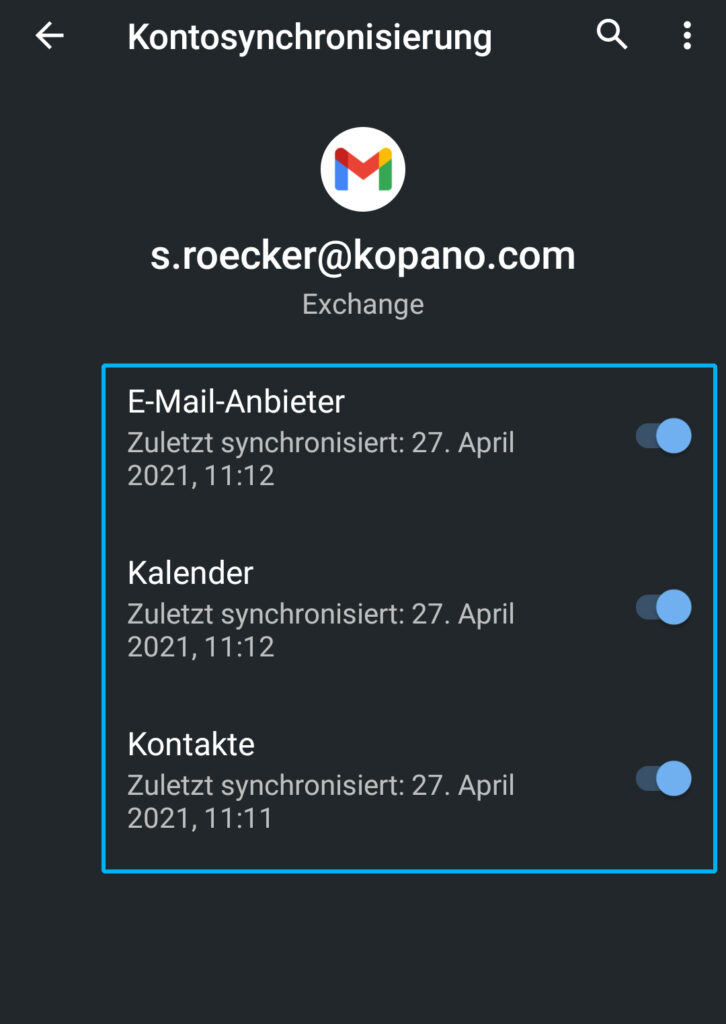
And choose which data you want to synchronise – email, calendar and/or your contacts.
That was all. You can now access and edit your mails and appointments via your Gmail client and the Calendar app. Contacts are displayed in your phone app.
Have fun with your mobile Kopano!
Setting up Kopano on an iPhone/iPad
Setting up Kopano via ActiveSync on an iPhone or iPad is quite simple. First go to your settings.
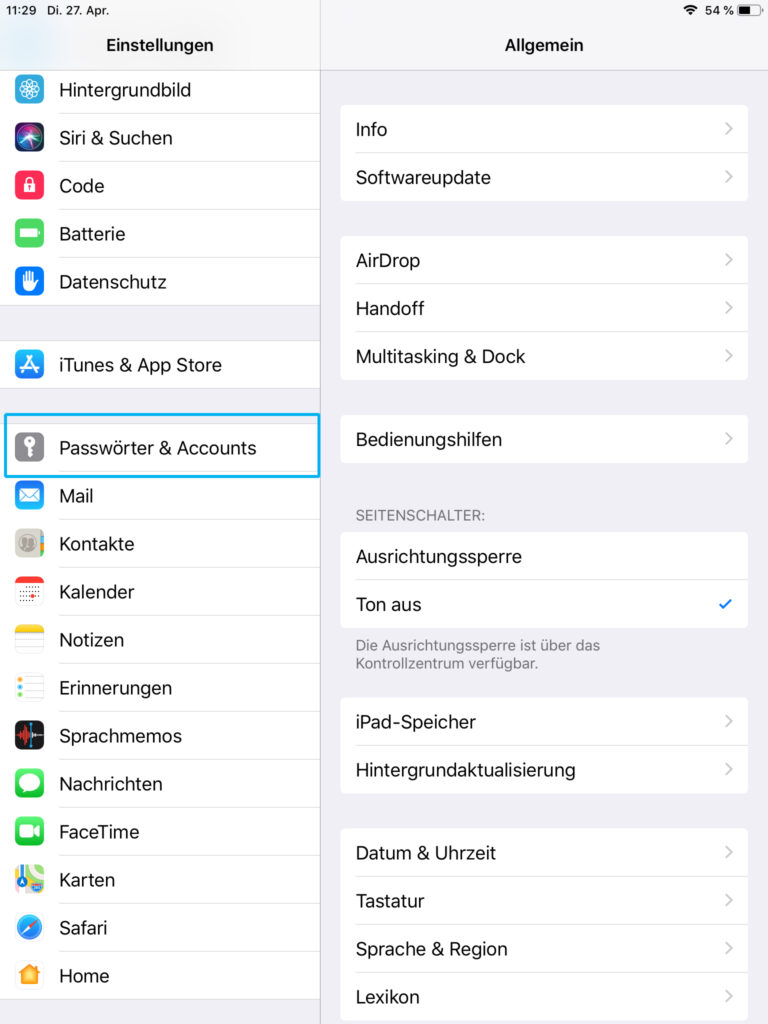
1. Open settings
Go to your settings and tap on Passwords and Accounts.
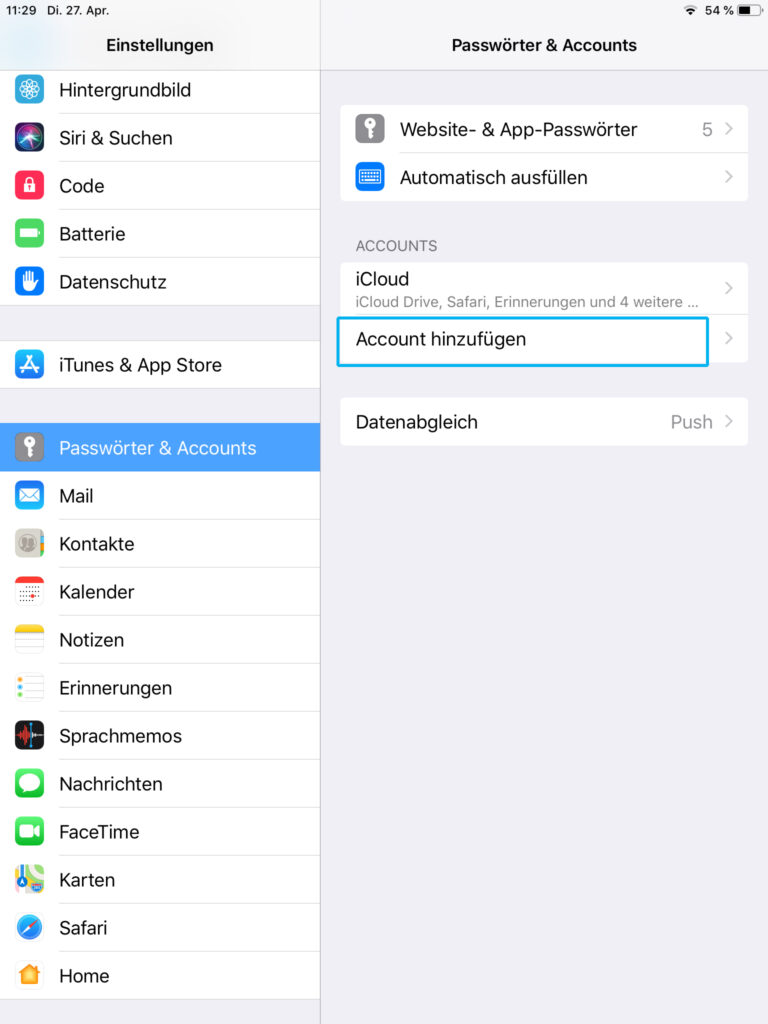
2. Add an account
Under Passwords and Accounts, tap Add Account.
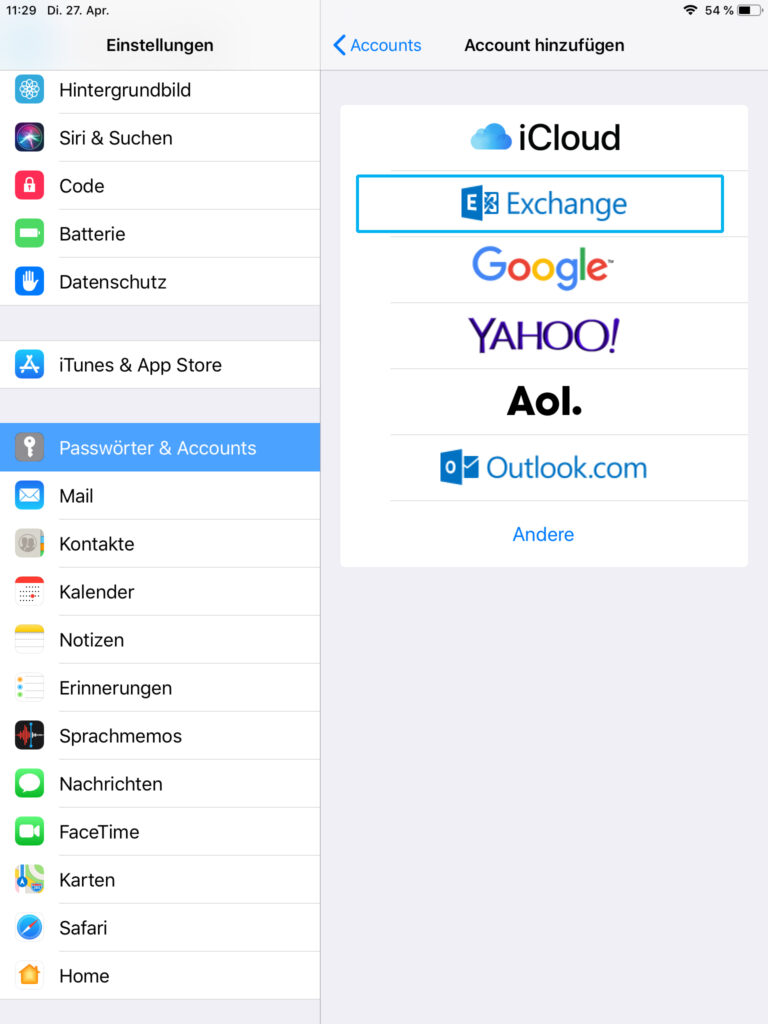
3. Select Exchange
Select “Exchange” from the list.
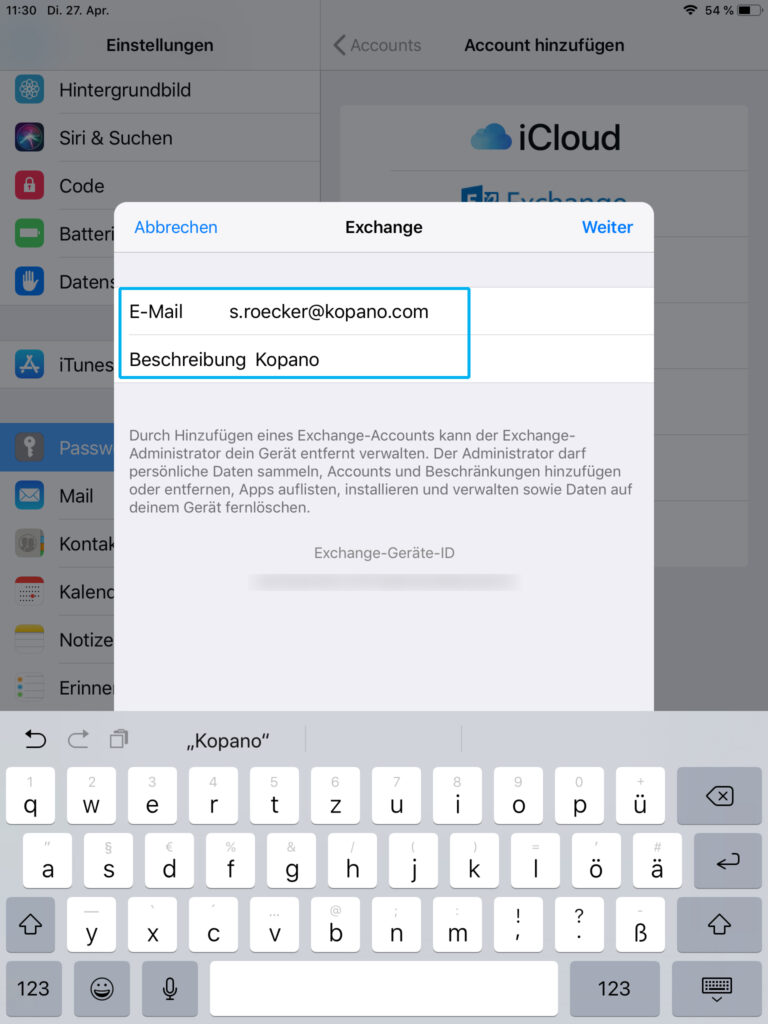
4. Enter e-mail address
Enter the e-mail address you want to set up – the screen shows my Kopano e-mail address as an example. Optionally, you can give the account your own name. I have named mine “Kopano” in the example. Tap on “continue” at the top.
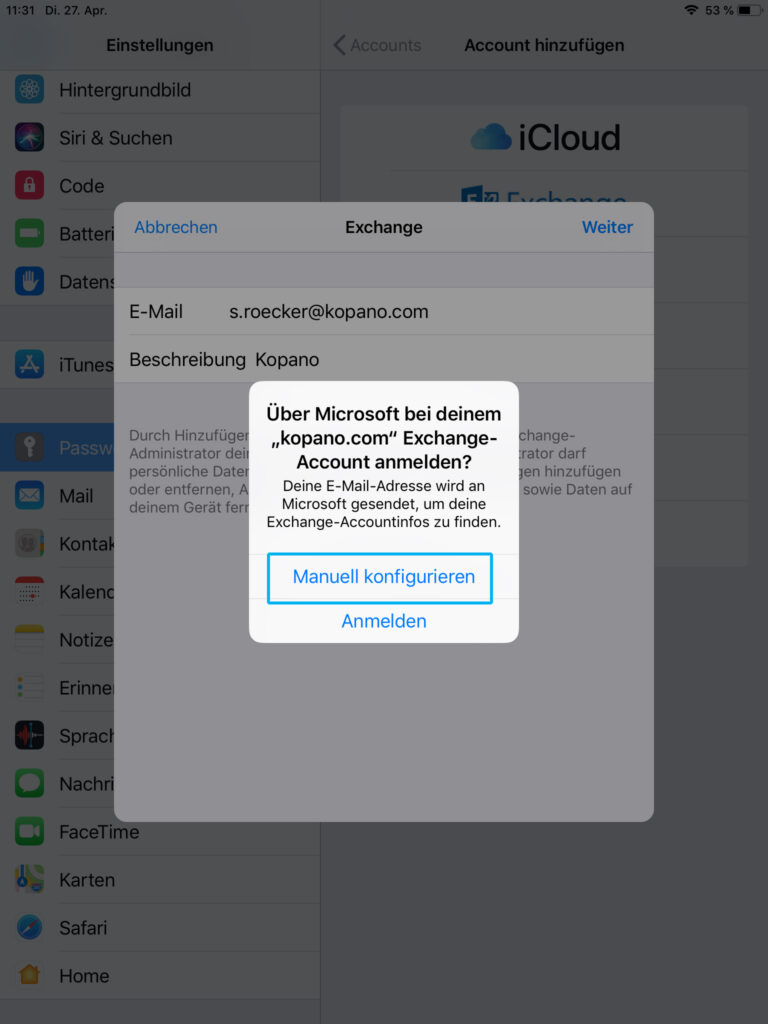
5. Configure manually
In the following pop-up window, please select “Configure manually”.
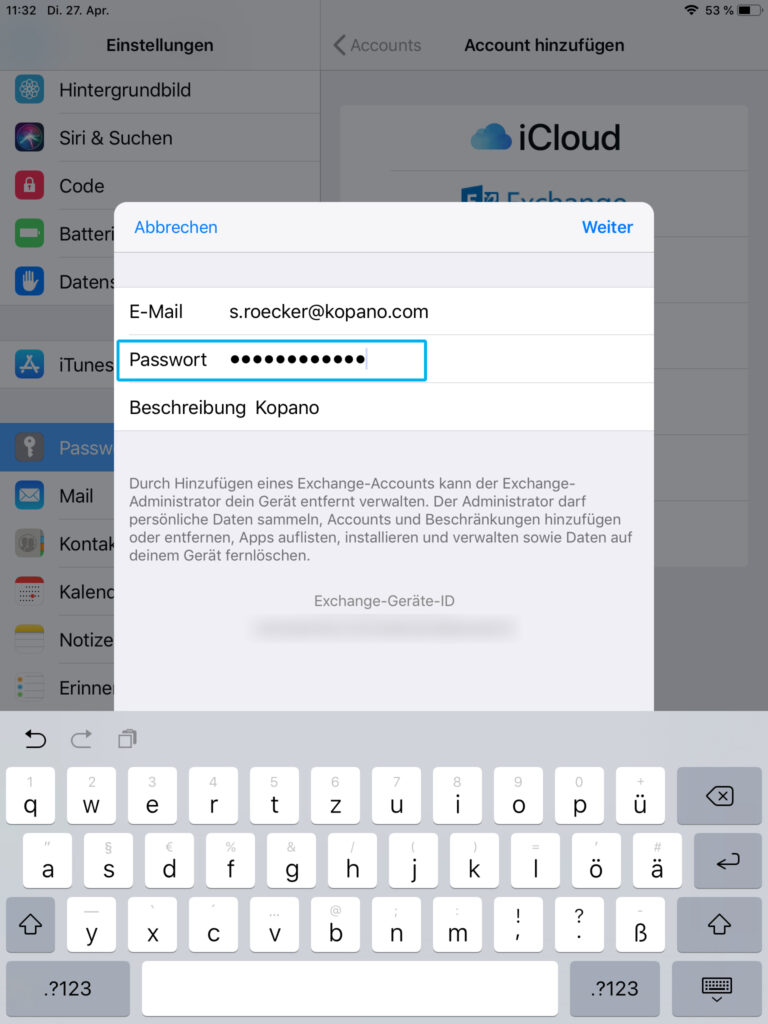
6. Enter password
In the next window, enter the password for your Kopano account and tap on “Next”.
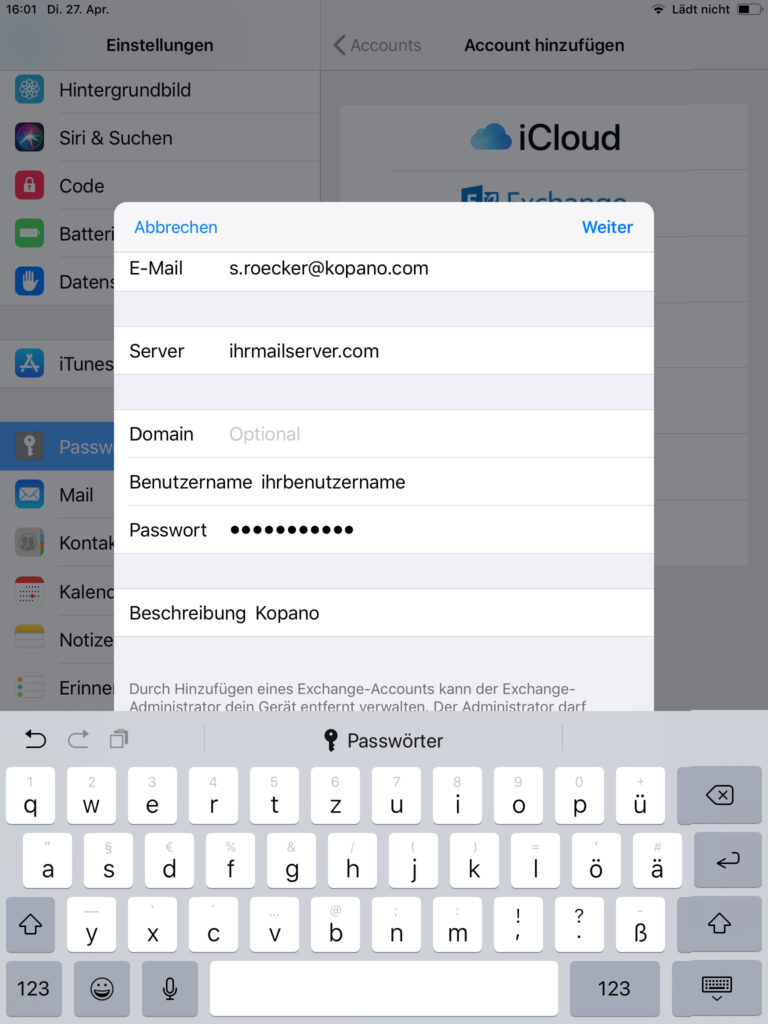
7. Enter server settings
In the screen that now appears, complete the server settings: Your user name and the address of your mail server. The entries shown are only examples! Your administrator or IT service provider will tell you which data you have to enter.
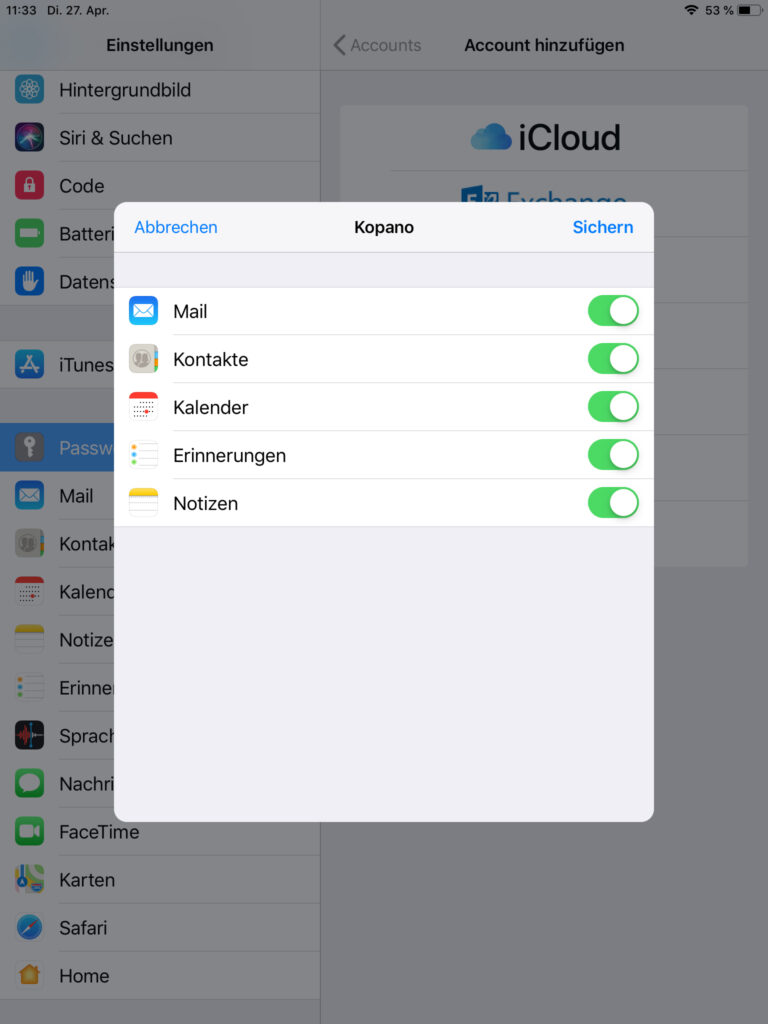
8. Synchronise
Finally, select which data you want to synchronise.
That was all. You can now access and edit your mails, contacts and appointments via your mail client, the contacts app and the calendar app.
Have fun with your mobile Kopano!


 #
#