At Kopano we have been developing packages to easily install and update Mattermost for quite some time now. For those using the Univention Corporate Server (UCS) we maintain an app that sets up Mattermost and configures it for you automatically.
But what if you already have a chat platform in your company and cannot migrate all users at the same time? Or you want to provide a Mattermost chat for all your customers, but only want to buy a Mattermost subscription for your internal users? Or you have a subset of your users relying on your old chat platform and clients?
 Source: https://xkcd.com/1782/
Matterbridge was designed to help out in exactly these scenarios. As the name already implies, it acts as a bridge between different providers (namely IRC, XMPP, Gitter, Mattermost, Slack, Discord, Telegram, Rocket.Chat, Hipchat (via xmpp), Matrix, Steam, ssh-chat and Zulip) and will relay messages and files posted in e.g. Jabber to Mattermost.
This blog will explain how to install matterbridge and will configure matterbridge to mirror a specific channel within Mattermost.
Running matterbridge
Note: if you want to run matterbridge on Univention you can skip this part and jump directly toward “Running matterbridge on Univention”
The latest version of matterbridge can be downloaded from the Github releases page of matterbridge. As an alternative to running the above binary, matterbridge can also be run through Docker.
Before matterbridge can run we need a basic configuration. A dedicated service account in Mattermost needs to be created first.
The following commands will create a service account called “matterbridge”. When executing the commands below, make sure to choose a pre-created random password for the “matterbridge” and note it down for later.
Subsequently, the user will be added to a team with the name “Univention” and two new channels are created within the team with the id “matterbridge1” and “matterbridge2”:
mattermost-platform user create --email="matterbridge@$your.domain" --password="password-of-matterbridge-user" --username=matterbridge

mattermost-platform team add Univention matterbridge

mattermost-platform channel create --team Univention --name matterbridge1 --display_name "Matterbridge Demo Channel"

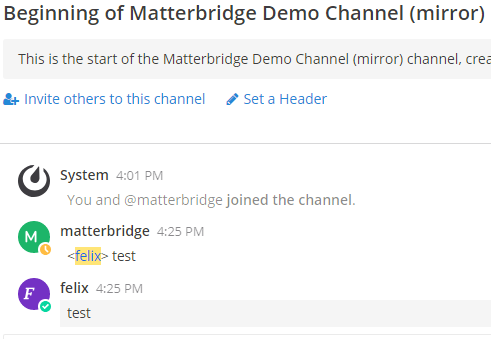
mattermost-platform channel create --team Univention --name matterbridge2 --display_name "Matterbridge Demo Channel (mirror)"
With a user and channels now available we can create a configuration file for matterbridge. The example configuration below is hopefully pretty self-explanatory. Make sure to adapt the values such as Server, Team, Password and channel to your local environment. I recommend storing the configuration for example in /etc/matterbridge.
[mattermost]
[mattermost.univention]
#The mattermost hostname. (do not prefix it with http or https)
Server="address.of.mattermost"

#the team name as can be seen in the mattermost webinterface URL
#in lowercase, without spaces
Team="univention"

#login/pass of your bot.
#Use a dedicated user for this and not your own!
Login="matterbridge"
Password="password-of-matterbridge-user"

RemoteNickFormat="<{NICK}> "
PrefixMessagesWithNick=true
# should be set to false when using a trusted ssl cert (system ca may not be trusted inside of the docker container)
SkipTLSVerify=true

[[gateway]]
name="gateway1"
enable=true
    [[gateway.inout]]
    account="mattermost.univention"
    channel="matterbridge1"

    [[gateway.inout]]
    account="mattermost.univention"
    channel="matterbridge2"
With a user and the configuration in place, we can start matterbridge for the first time. The command below will start matterbridge in the foreground and as long as matterbridge is running messages will be mirrored between the configured channels.
docker run -ti -v /etc/matterbridge/matterbridge.toml:/matterbridge.toml 42wim/matterbridge
 Once you are happy with your configuration you can stop the foreground Docker command and run it instead in the background. This can be achieved with the following command:
docker run -d --restart=unless-stopped -v /etc/matterbridge/matterbridge.toml:/matterbridge.toml 42wim/matterbridge
Running Matterbridge on Univention
When running Mattermost and matterbridge on a Univention Corporate Server (UCS) setup is a lot easier, as installing the app will already take care of creating the matterbridge user and an example matterbridge.toml for you.
To modify the Matterbridge configuration after the initial installation you need to modify the file /etc/matterbridge/matterbridge.toml. Since Matterbridge does not auto detect changes to its configuration you need to restart the app by issuing systemctl restart docker-app-matterbridge.service.
More information on running the app is displayed in a “readme” file after the app has been installed.
Where to go from here?
You now have a very simple demo setup where matterbridge is mirroring all Messages from one channel to another channel. Please check the matterbridge Wiki on how to configure matterbridge to connect to your local chat or ChatOps platforms and Mattermost at the same time.
Want to learn more about matterbridge? Let us know in the comments or contact us via .


